
Shadowness
Well-Known Member
Actions can be very useful tools, they basically save time and hassle by saving certain steps of processing (levels, sharpening, resize etc) into one click.
For example, if there's one function you use a lot, like auto levels, just creating an action for this saves having to go into the menu every time (and this can save a lot of time if you have hundreds of photos to sort through!), so I will show how to create a simple action for this, then we get a bit more complicated")
Step one: Open an image (in photoshop)
Step two: Click on the 'Create new action' icon:
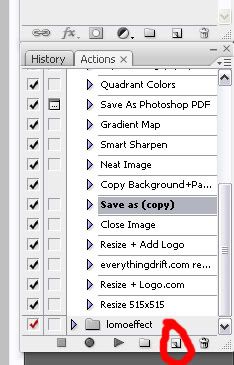
Name it 'Auto-Levels' (or whatever your making the action for)
NOTE: Make sure your set to start recording your steps before you make the action, as what ever you do after that will be recorded. You can stop the recording by clicking on the square, and circle resumes recording.
Step three: Select 'Auto-levels' from the menu (Image -> Adjustments -> Auto levels)
Photoshop will have applied the auto levels tool, and recorded it in the action.
Step four: Click on the square (stop) to end recording.
The action will now have been made for auto levels, so now all you have to do is click on 'Auto levels' and then play (triangle) to apply the function.
Now we get a it more complicated. I heard a lot of you want to know how to resize an image and apply a sig in a single process, so I shall explain.
Firstly, this process will resize and logo landscape photos, I do not know a way to mix the two types sadly.
Step one: Open an image.
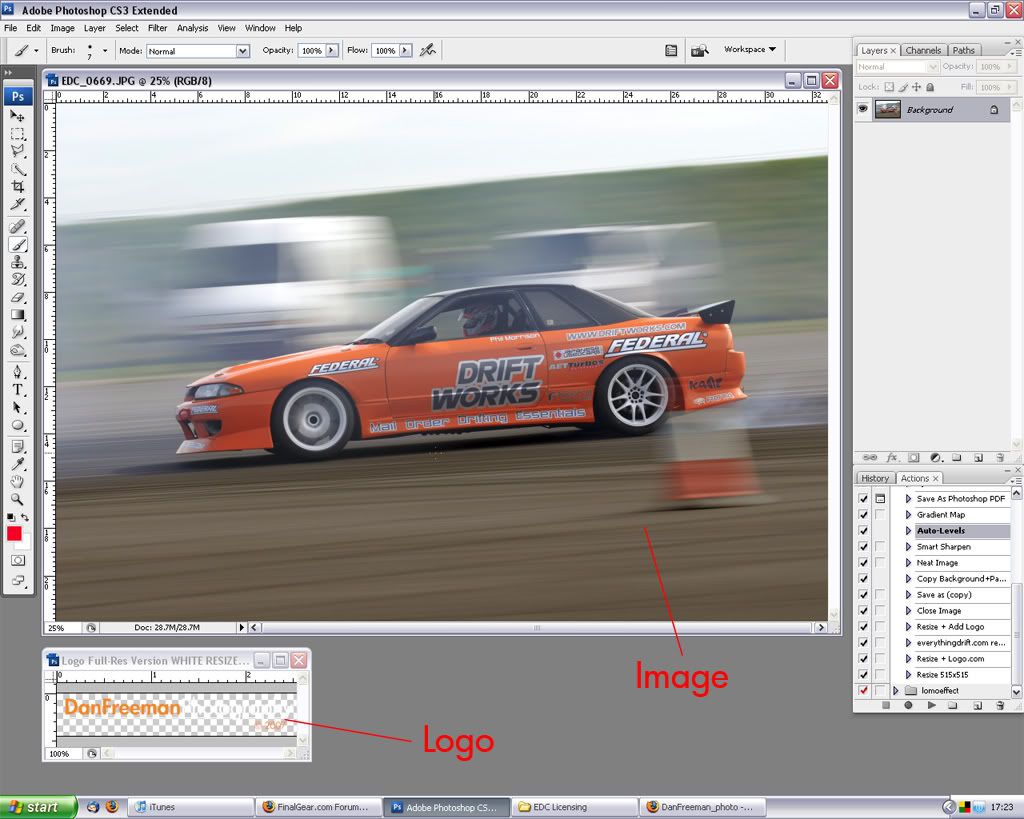
Step two: Open your logo (I assume it's made on a transparent layer!)
So you should have this on your screen:
Step three: Create an action (name it resize + logo, or whatever you want)
Step four: Resize the image to whatever size you want. NOTE: the actions are being recorded!
Step five: Select the logo image (this does matter!). Now you have to copy the image and paste it onto the photo, so with the logo selected, hit ctrl+c, then slect the photo image, then ctrl+v.
You should now have this on your screen:

Step six: Now you have to move the logo to where you want it on the photo. It is crucial that you use ctrl+t, instead of moving it with the cursor. If you dont, photoshop gets a bit thick and doesnt move the logo when you create the action.
So hit ctrl+t, then move the logo, then click on the tick to confirm, you should see another entry in the action list whn you hit the tick
THAT'S IT! Simple as! (hopefully)
Important note: You have to have the logo image open in photoshop for this action to work, as it refers to that every time the action is processed.
If you have hundreds of photos to sort through, select batch process, then select this action and it will perform that action for every photo - and you do nothing!
Hopefully that's explained it, sorry it's a bit wordy, but it would only have loads of pics of photoshop! Any questions, feel free to ask!
For example, if there's one function you use a lot, like auto levels, just creating an action for this saves having to go into the menu every time (and this can save a lot of time if you have hundreds of photos to sort through!), so I will show how to create a simple action for this, then we get a bit more complicated
Step one: Open an image (in photoshop
)Step two: Click on the 'Create new action' icon:
Name it 'Auto-Levels' (or whatever your making the action for)
NOTE: Make sure your set to start recording your steps before you make the action, as what ever you do after that will be recorded. You can stop the recording by clicking on the square, and circle resumes recording.
Step three: Select 'Auto-levels' from the menu (Image -> Adjustments -> Auto levels)
Photoshop will have applied the auto levels tool, and recorded it in the action.
Step four: Click on the square (stop) to end recording.
The action will now have been made for auto levels, so now all you have to do is click on 'Auto levels' and then play (triangle) to apply the function.
Now we get a it more complicated. I heard a lot of you want to know how to resize an image and apply a sig in a single process, so I shall explain.
Firstly, this process will resize and logo landscape photos, I do not know a way to mix the two types sadly.
Step one: Open an image.
Step two: Open your logo (I assume it's made on a transparent layer!)
So you should have this on your screen:
Step three: Create an action (name it resize + logo, or whatever you want)
Step four: Resize the image to whatever size you want. NOTE: the actions are being recorded!
Step five: Select the logo image (this does matter!). Now you have to copy the image and paste it onto the photo, so with the logo selected, hit ctrl+c, then slect the photo image, then ctrl+v.
You should now have this on your screen:
Step six: Now you have to move the logo to where you want it on the photo. It is crucial that you use ctrl+t, instead of moving it with the cursor. If you dont, photoshop gets a bit thick and doesnt move the logo when you create the action.
So hit ctrl+t, then move the logo, then click on the tick to confirm, you should see another entry in the action list whn you hit the tick
THAT'S IT! Simple as! (hopefully)
Important note: You have to have the logo image open in photoshop for this action to work, as it refers to that every time the action is processed.
If you have hundreds of photos to sort through, select batch process, then select this action and it will perform that action for every photo - and you do nothing!
Hopefully that's explained it, sorry it's a bit wordy, but it would only have loads of pics of photoshop! Any questions, feel free to ask!