Kip_6666
I Bought This Title :o
Made a interesting pic but the lighting and colours are a bit dull?!
Have no fear, for there is a way to save it a bit using photo editing programs.
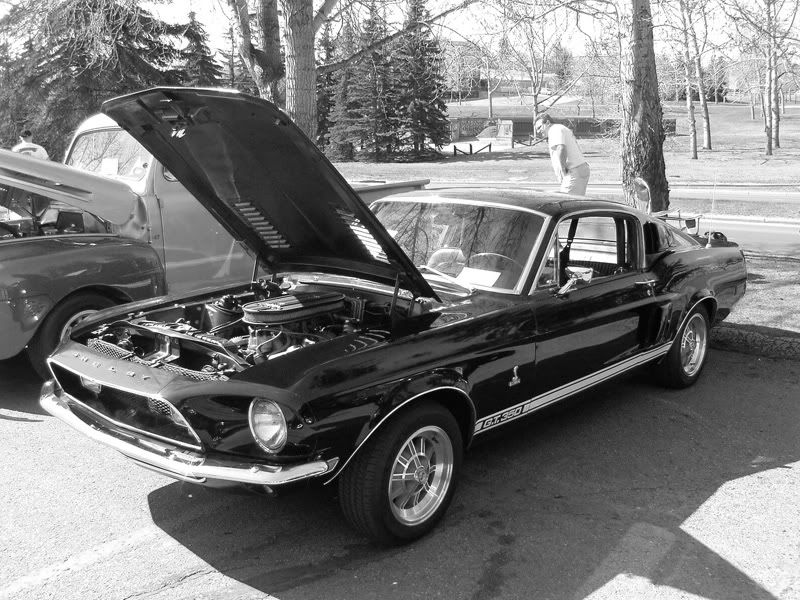
Lets have a little example:

This is OK, not bad, which is good enough for my level. But we can make it better, less boring.
Lets start up our editing software, and duplicate the background layer.
Then adjust it to blend using the overlay option. Move the bar up and down so it doesn't look totally fake. Or what ever you are in the mood for.
As so:

Notice the colours have improved and its become a more vibrant picture.
Last thing I also like to do is adjust the brightness and contrast.
Make sure you've merged both the layers into one so you're not accidentally editing only the one layer.
OK, from the drop down items on the top select:
Adjust > Brightness and Contrast >
We're presented with a whole array of options, best way to learn the differences is to go play with them yourself, you'll quickly notice if it improves the picture or not.
One of my favourites is "Histogram Equalise" this, as the help nicely explains does the following.
Of course depending on the photo, the results may vary but mostly is very pleasing to the eye.
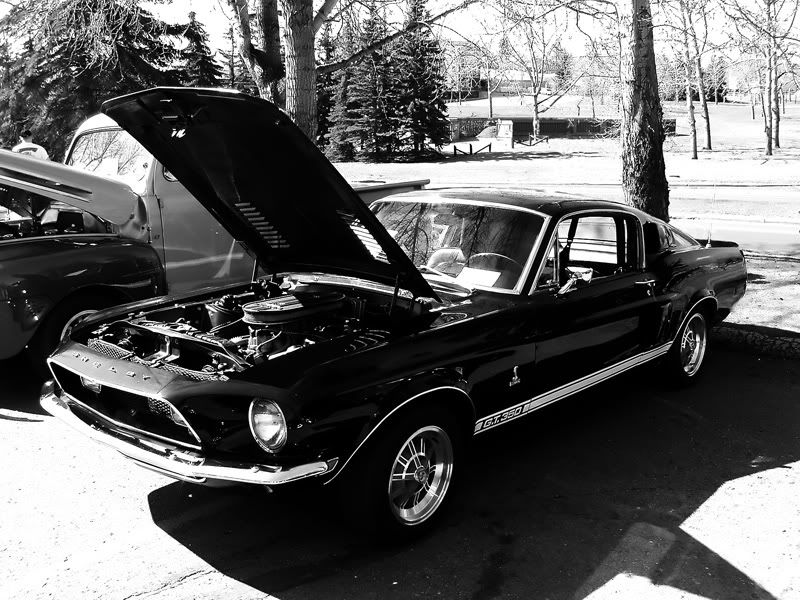
This is what it did to our picture. Notice it has helped improved detail, and the colours seem a bit more natural.

Lets place our original next to it:
See, I think its better.")
Another nice option if you want a bit more control or less of an impact than the equalise one is the Histogram Adjustment. Lots of slide bars and values to alter.
With a more interesting picture it can make all the difference:


It only takes a few minutes and can help lift your photo to a whole new level.
Have no fear, for there is a way to save it a bit using photo editing programs.
Lets have a little example:
This is OK, not bad, which is good enough for my level. But we can make it better, less boring.
Lets start up our editing software, and duplicate the background layer.
Then adjust it to blend using the overlay option. Move the bar up and down so it doesn't look totally fake. Or what ever you are in the mood for.
As so:
Notice the colours have improved and its become a more vibrant picture.
Last thing I also like to do is adjust the brightness and contrast.
Make sure you've merged both the layers into one so you're not accidentally editing only the one layer.
OK, from the drop down items on the top select:
Adjust > Brightness and Contrast >
We're presented with a whole array of options, best way to learn the differences is to go play with them yourself, you'll quickly notice if it improves the picture or not.
One of my favourites is "Histogram Equalise" this, as the help nicely explains does the following.
Use the Equalize command to distribute the lightness values of pixels more evenly across the lightness spectrum from black to white. This command makes the darkest pixel as close to black as possible and the lightest pixel as close to white as possible, and then distributes the remaining pixels evenly between these two values.
Of course depending on the photo, the results may vary but mostly is very pleasing to the eye.
This is what it did to our picture. Notice it has helped improved detail, and the colours seem a bit more natural.
Lets place our original next to it:
See, I think its better.
Another nice option if you want a bit more control or less of an impact than the equalise one is the Histogram Adjustment. Lots of slide bars and values to alter.
With a more interesting picture it can make all the difference:
It only takes a few minutes and can help lift your photo to a whole new level.